


SEWING AN APRON FOR BEGINNERS
- Susan

- Mar 18, 2018
- 6 min read
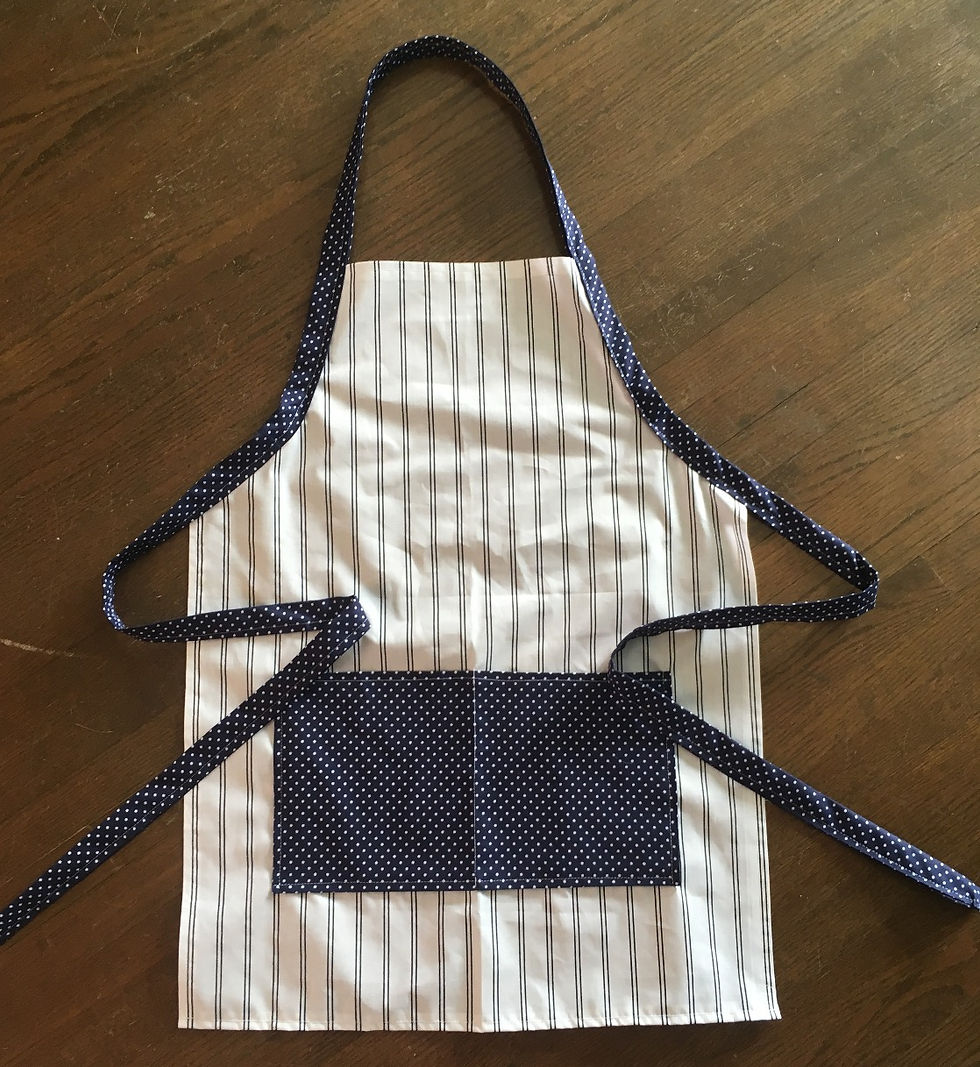
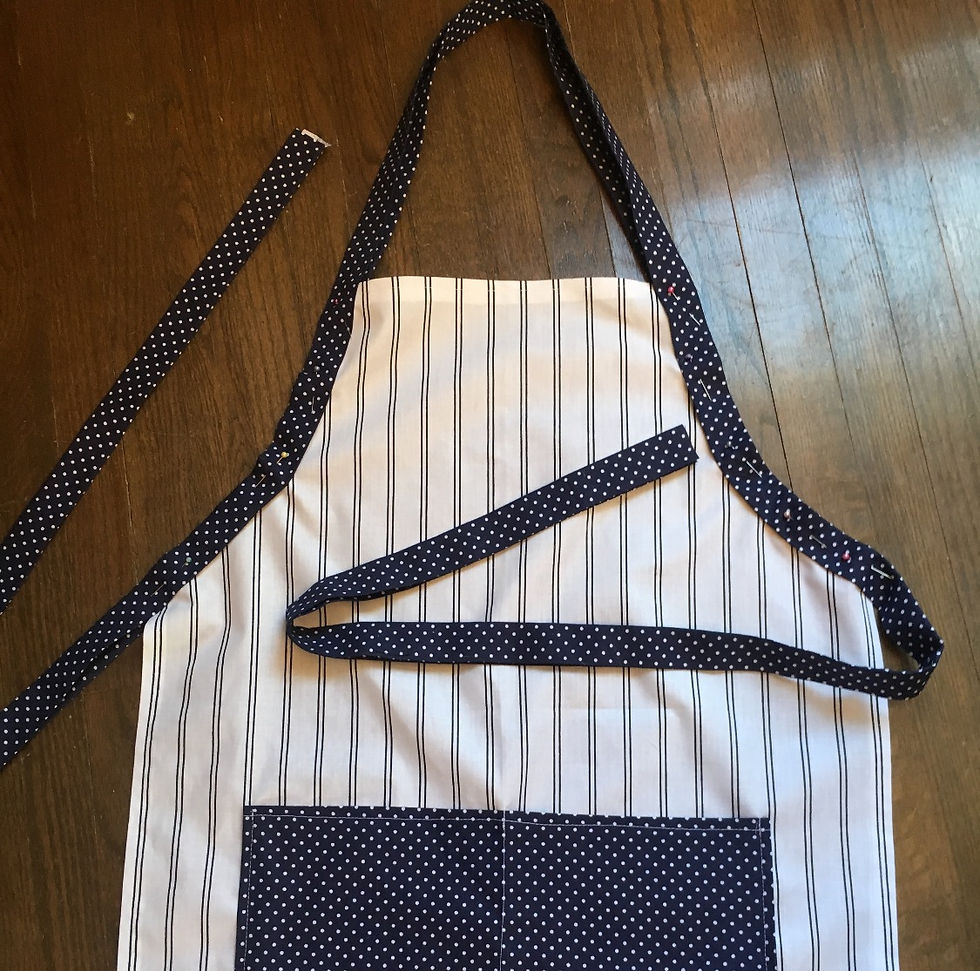
Today I will be instructing you on how to sew an apron for beginners! Here's an image of the one I made earlier today:
Before you get started you will need:
- Fabric (cotton), I chose to use two different colours/ patterns but the choice is
completely yours - also I chose a striped pattern *this is a difficult pattern to work with,
as the stripes need to be lined up perfectly, so chose your fabric pattern according to
the difficulty level you are comfortable with*
- Thread (that matches the colour of your fabric)
- Pins (I prefer the pins with the balls on the end)
- Tailors Chalk (or pencil - but this may leave a mark if you are using a light coloured
fabric)
- An Iron (and ironing board)
- Scissors
& of course your sewing machine!
I have broken down the process of creating this apron into 8 easy to follow steps! This should take you around an hour to make, have fun!!
Step 1) Preparing your fabric
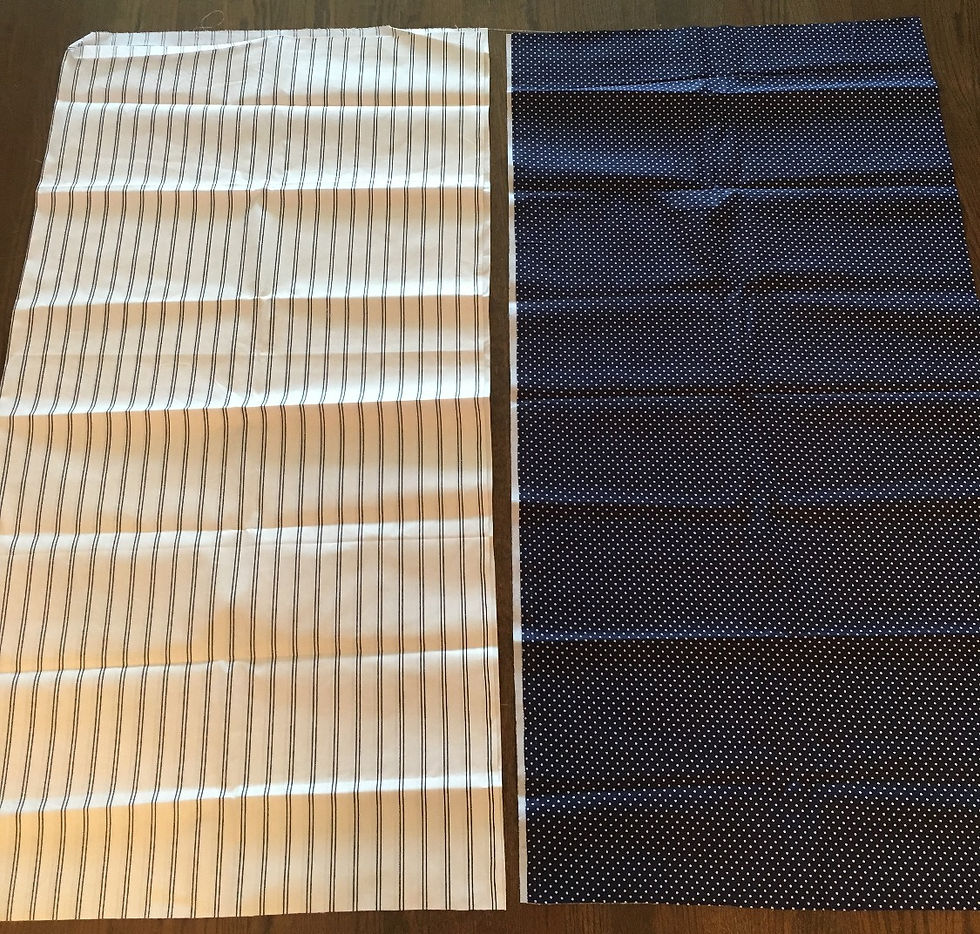
The first thing you're always going to want to do before starting your project is machine wash your fabric, and iron it. In the photos on the left, you can see the difference it makes once the fabric is ironed. When you're preparing your fabric for cutting, you want to make sure it's in the same state as you'd want your final product to be in.
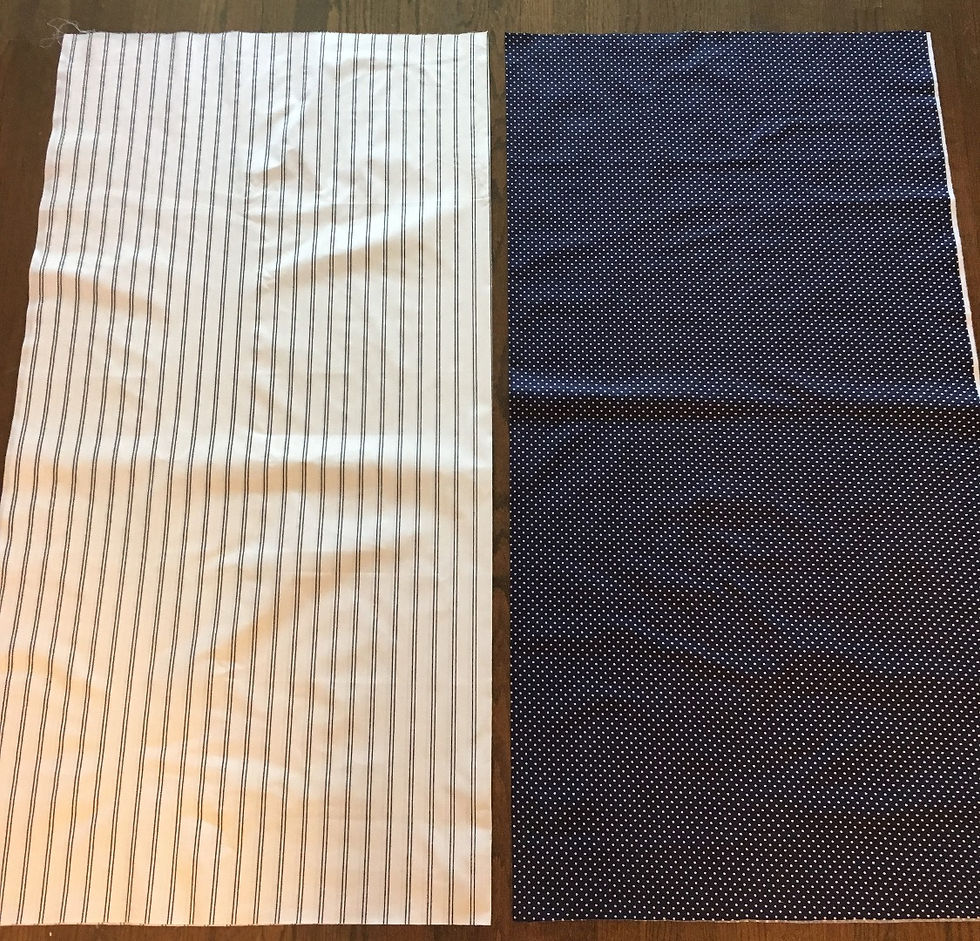
The fabric here (left) is folded. For this project you're going to want to fold your fabric to ensure that your design is symmetrical. One thing to note is that your fabric does not need to be folded down the centre. In fact, in order to save fabric it would be a good idea to re-fold your fabric so that only the width of your pattern is 'on the fold'. (Divide the fabric into thirds, and only fold along one of these lines, leaving one third of your fabric single ply).

Step 2) Measuring, Marking and Cutting Out the Apron
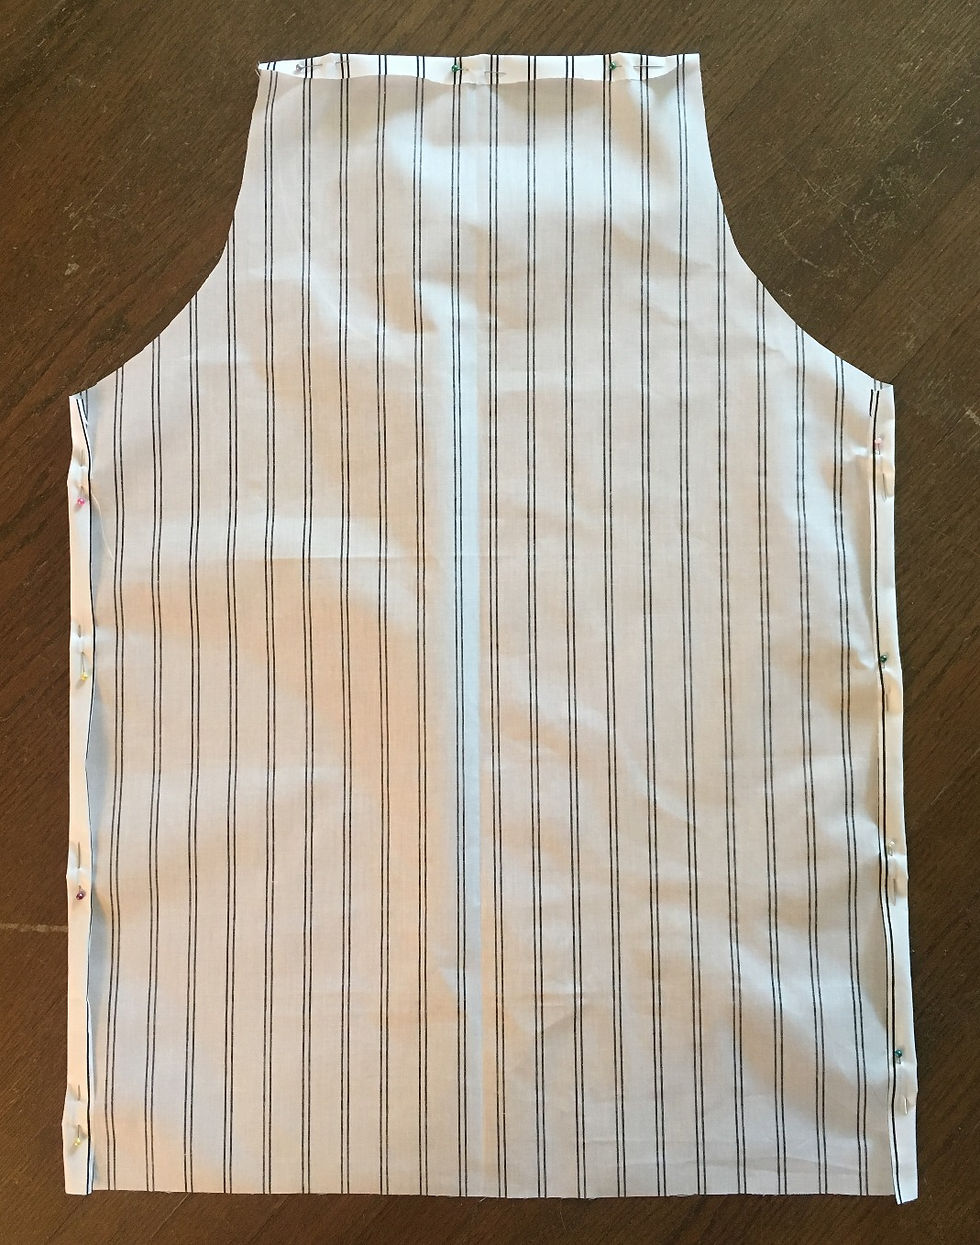
The shape you are going to want to draw out on your fabric will look like the image on the right (in the image the fabric is folded - the edge on the right is placed on the fold)
The dimensions for this piece are:
Length - 70 cm
Width - 28 cm (when unfolded 56cm)
Length from top of garment to bottom of sleeve curve - 22cm
Width from centre seam to beginning of sleeve curve - 12 cm
This is a good size for a female young adult /female adult (you may wish to add length or width if you are tall, large or male)
You will also need to cut a sleeve curve. You can do this by eye-balling it, but just remember that you want it to be low enough to facilitate you moving your arms around when wearing the garment.

If you cut a curve and are unsure if it is right, unfold the fabric and hold it up to your body to see for yourself!
You will also need to cut (in your accent fabric, should you choose to use one):
1 pocket rectangle 17 x 19 cm to place on the fold (19cm edge is on the fold)
3 - 4 strips of fabric 4 inches thick, I would do these the length of your fabric as they will become your bias binding and the longer the better.
Once you have cut these pieces you are ready to start sewing!
Step 3) Pin & Sew the Apron
(I will refer here-in to the fabric in terms of pretty side and ugly side - pretty side meaning the side that you would like facing outward)
Start by unfolding your fabric, flipping it so that the pretty side is face down, and pinning the top and two side edges roughly 1 to 1.5 cm in (see image left).
Use a straight stitch, removing your pins as you sew. I would recommend back stitching at the start and end of every seam for reinforcement.
Once you have sewn these seams, iron them flat. Repeat these steps with the bottom edge of your fabric.
Step 4: The Pocket

Start by unfolding your pocket, flipping it so that the pretty side is face down, and pinning along one of the longer / top edges 1 to 1.5 cm (see image right).
Use a straight stitch, removing your pins as you sew and remember to backstitch.
Fold and iron the remaining three edges
1 to 1.5 cm toward the ugly side.
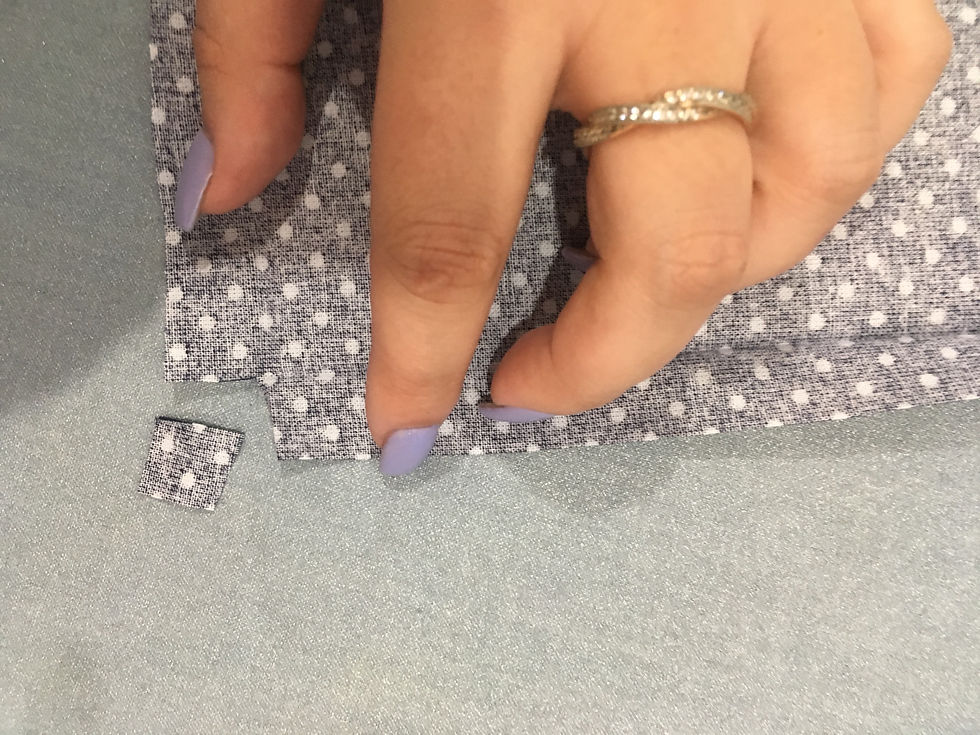
I clip my corners, meaning that I cut out the small square that is created in the bottom two corners of your fabric once it is ironed (to reduce bulk and ensure clean lines). Simply unfold the creases you ironed, and snip out the corner, then you can re-fold and if you prefer, re-iron these seams. Fold your pocket in half and iron your pocket again to mark the middle of your piece. (Also iron the body of your garment in half to mark the centre line if there is not already one)

Step 5: Attach the Pocket to the Apron
As you can see on the left, you need to align the centre line creases to ensure that your pocket is centred on the garment. Pin the pocket here.
You can place the pocket as high or low on the apron as you'd like. (After I took this photo I shifted the pocket down, as it felt more comfortable to me).
Using a straight stitch, sew along the two side and bottom seams. Optional: Sew along the centre fold of the pocket to create two smaller pockets, rather than one large one ( I did!)
Step 6: Create Bias Binding
If you wish, you can just buy bias binding at Fabricland, but I think its more fun to make your own!
Start by taking two of your 4 inch strips and placing them pretty side together. Sew the short edge on one end using a straight stitch. Repeat with all of

the strips until you have one massive long chain of fabric.
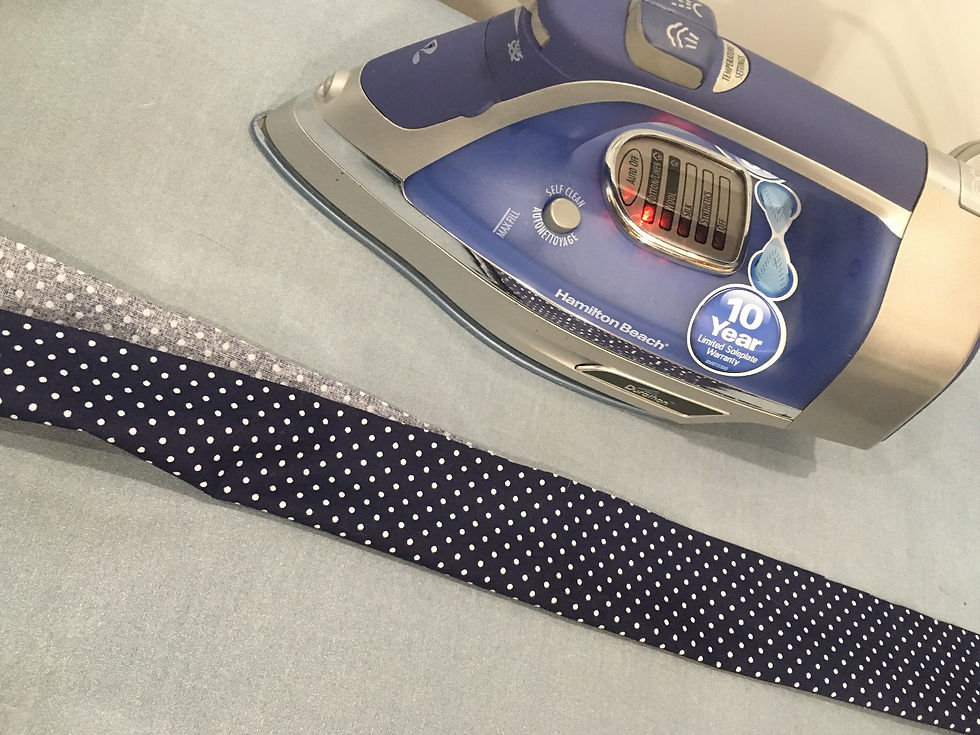
First, you're going to want to fold the 4 inch strip in half (ugly sides together), and iron a crease (top image right). *your fabric will now be 2 inches thick*
Next, unfold your fabric, and refold both sides in to the centre crease, (bottom image right). Iron this crease. *your fabric will still be 2 inches thick, but have no raw edges*
Lastly, you're going to want to fold this in half again, along the first crease that you ironed, and iron again. *your fabric will now be 1 inch thick, but 4-ply*
Always be careful when ironing, and handling fabric which you just ironed as it can retain heat and be hot to the touch. You're going to want to ensure a very hot iron for making bias binding.
Step 7: Pin Bias binding to Apron
Start by folding your bias binding in half and placing it around your neck to measure the height you'd like your apron to sit at (mark with chalk).
Pin your bias binding to your apron by placing the apron fabric inside the fold of the bias binding so that one edge is on top of, and on edge is below the apron fabric (left). Pin the entire length of bias binding together. Sew, using a straight stitch, from one end of the bias binding to the other, placing the presser foot of your sewing machine on the non-folded edge of the bias binding (closest to the apron fabric) and removing pins as you sew (you can also opt to use a zig-zag stitch here if you prefer).
Step 8: Try on (Adjust if necessary) & Make finishing touches
Once you have attached you bias binding, make sure to try on your apron to see how it fits! At this point you may want to trim your bias binding ties to ensure they are an appropriate length (& the same length).
You'll also want to make sure once you have attached your bias binding that you finish the two raw edges that are left at the end of your ties. You can do this by folding the raw edges of fabric in side the bias binding, and sewing a small seam, or simply folding the raw edges to the back and sewing a small seam as well.
Ensure that once you have finished, you look over your entire apron to clip any threads that were left behind while sewing! This will ensure your final product is neat and well crafted.
CONGRATULATIONS!!!
YOU HAVE NOW COMPLETED AN APRON
Let me know how you found this tutorial, any questions you might have or feel free to share how your experience went!! And as always, make sure to check Sip & Sew regularly for more blog posts!
--Susan


Comments